The Top: Part Two, Make Three

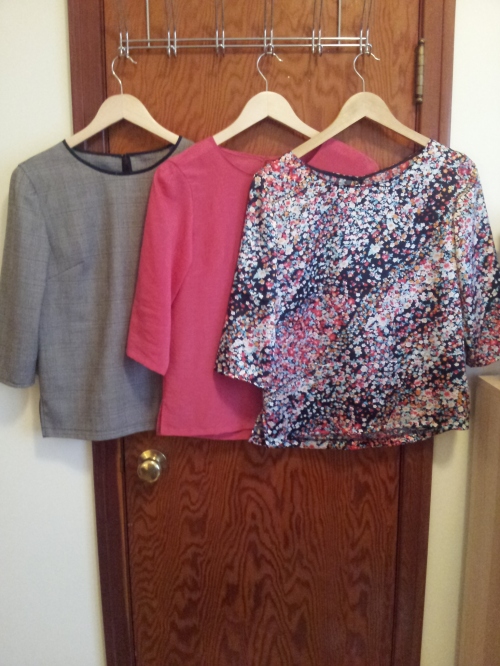
Yes, yes, yes, this is the same top as I talked about last week. Because of that, this post will be short and sweet.

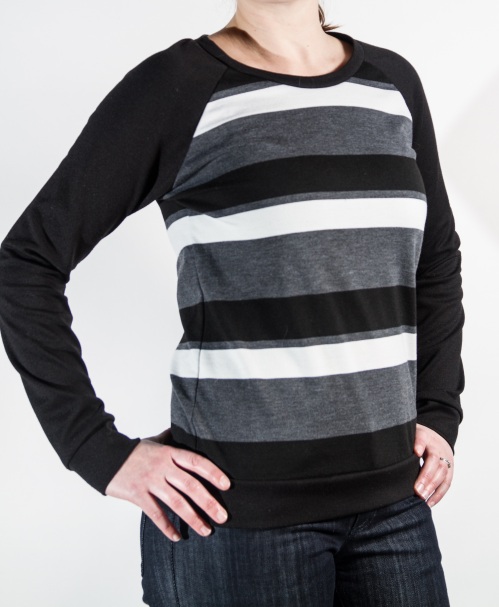
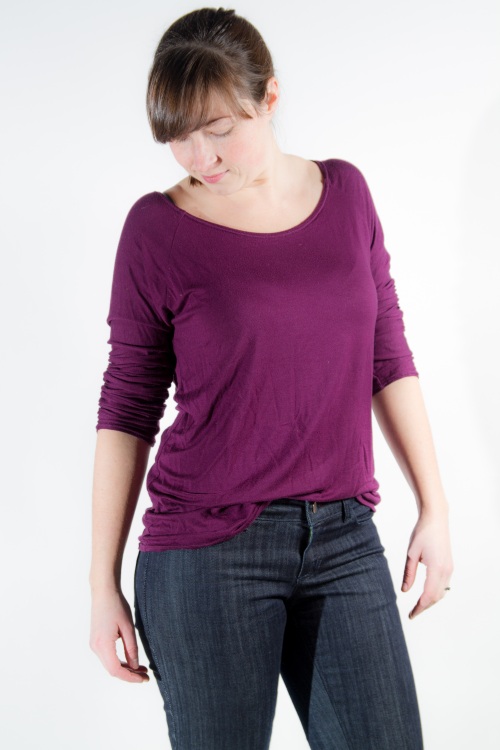
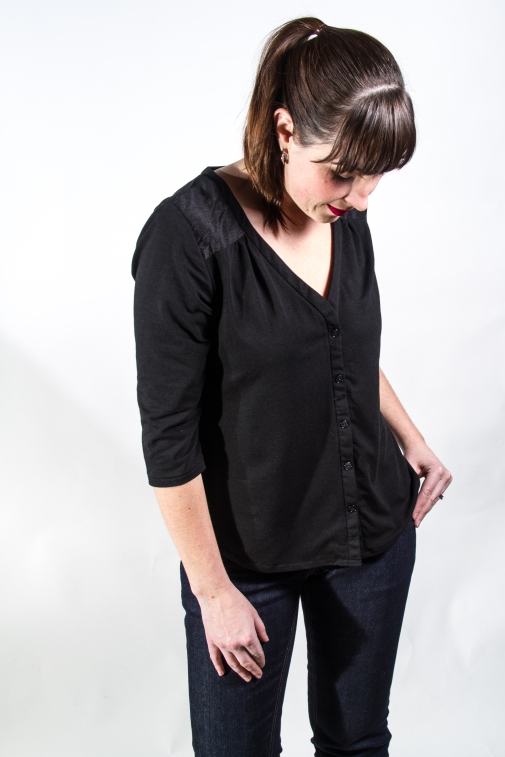
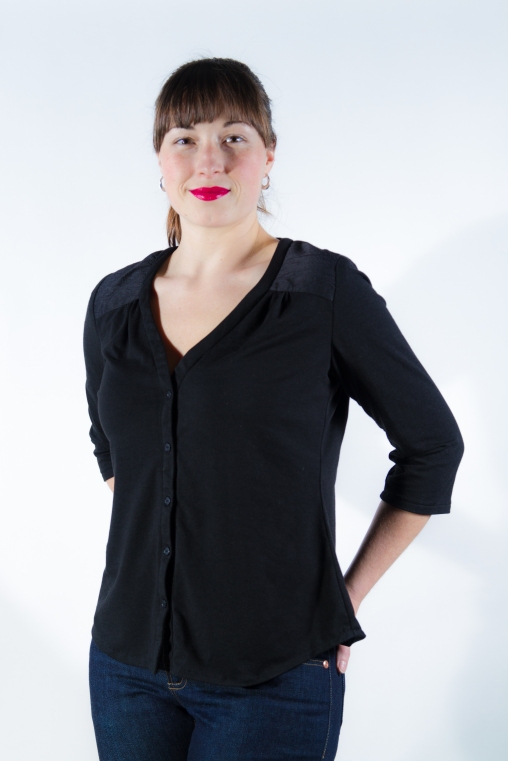
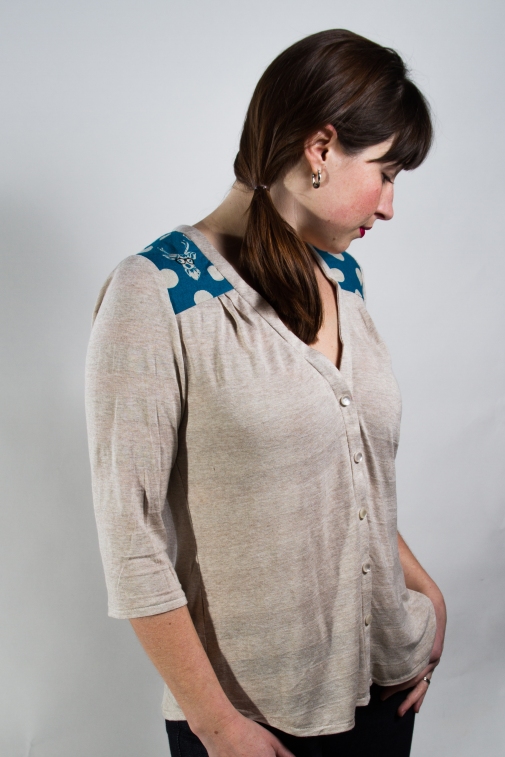
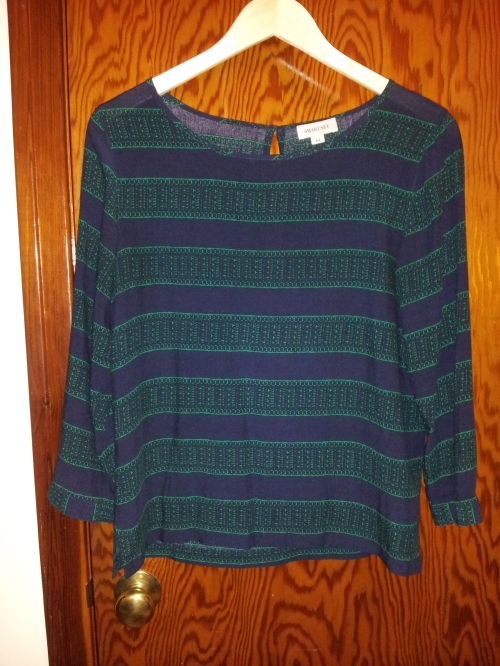
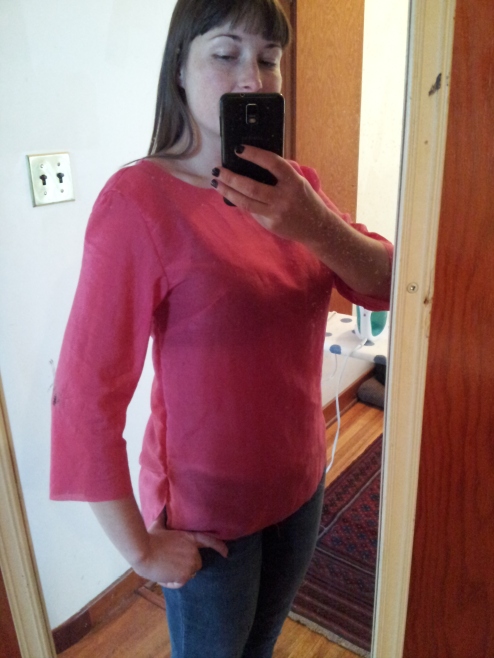
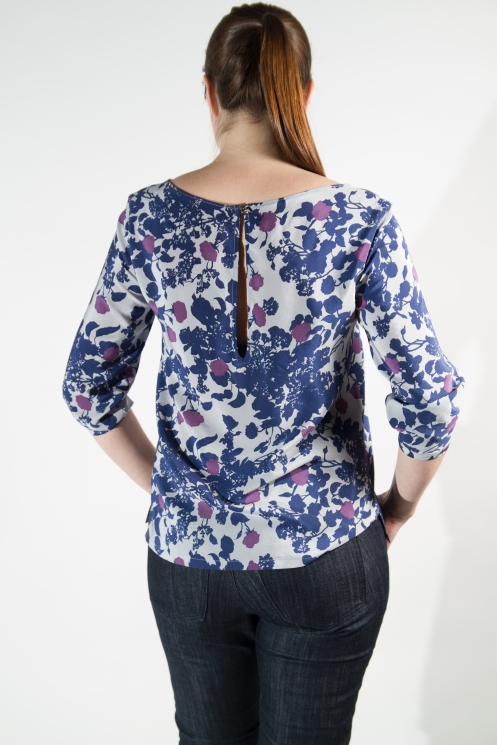
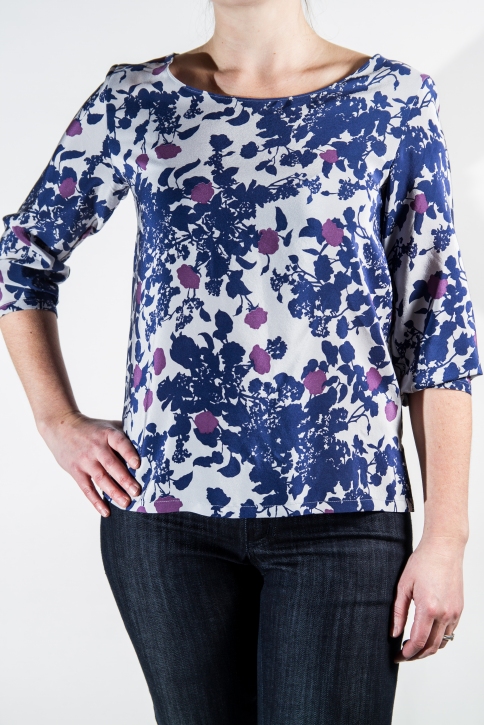
I used the same size size pattern as last time (size 10) but with a fabric that has so much more drape, the result was a bit different. I was aware that with a slinky fabric such as this, I might end up with a neckline that was more generous than intended, and to be sure I didn’t run into the same challenge as I did with this purple top, I lined the front neckline with some pink ribbon I had on hand. This has worked well to stabilize things, but every so often a flash of pink shows. Not a big deal, but something for me to keep in mind for next time. Check out those side stripe matching! Also, the arms, the stripes don’t match there, but I was limited by the amount of fabric I had (from my stash) and really wanted this top in this fabric. I can live with it.


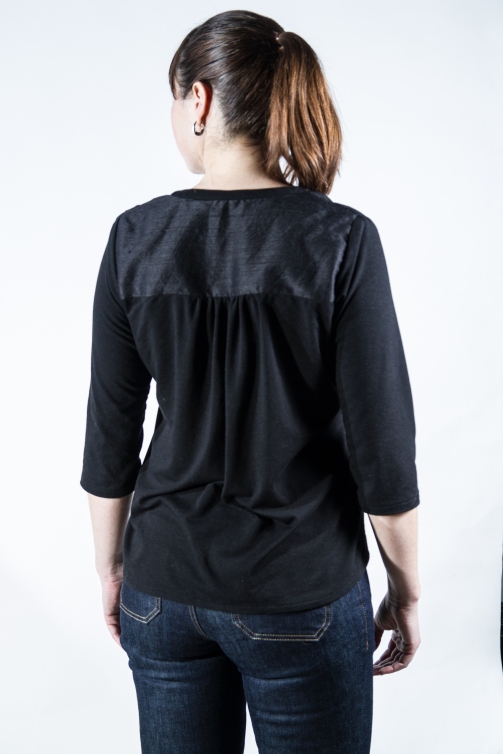
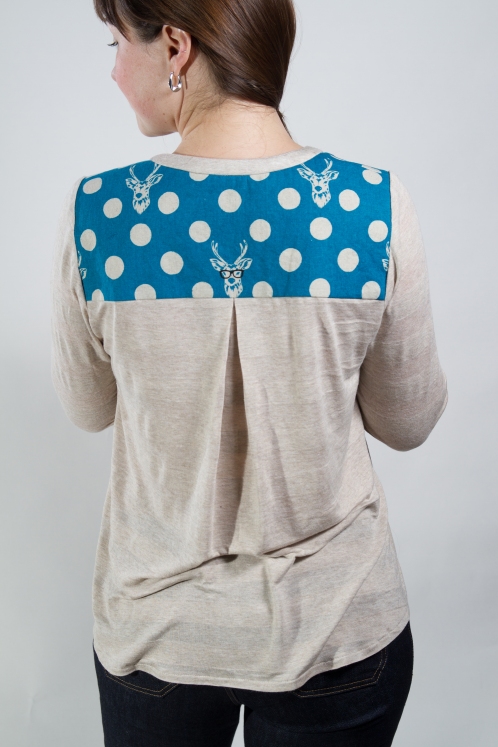
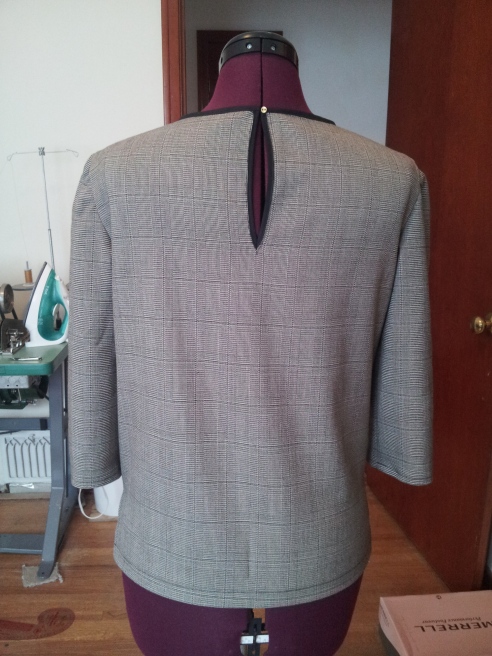
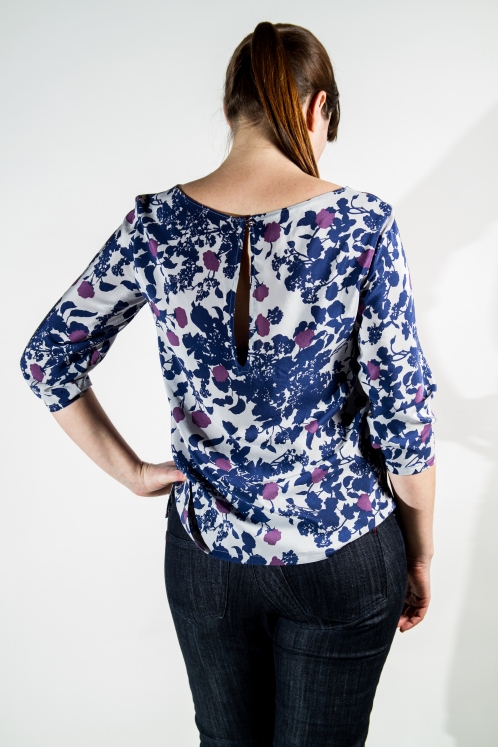
Something I didn’t factor in was the back drape. Once complete, I tried the top on and knew that the propensity of the top to slide off my shoulders, thus exposing my bra straps and requiring me to fiddle constantly, would drive me nuts. As mentioned above, I was working with very little yardage so had to get a bit creative. I dove into my sewing room garbage can and produced the rolled selvage edge et voila. I actually first sewed this little piece along the shoulder seam and really disliked the proportions created, but, moved down by about 5 inches, I quite like it.

This is easily one of my most frequently worn me-made tops. It’s comfy, the fabric is a delight against the skin and it shows enough skin to be fun, but is loose enough to wear while enjoying a good meal and a few too many glasses of wine.

What’s your favourite top pattern? Do you have a few? Are they for knits or wovens?

The Top: Part One

This is McCall’s 7127 – a pattern that I almost didn’t purchase. I had been doing some online pattern shopping one evening, as one is apt to do, and I came across this super cute, dropped shoulder, crossed back top designed for a somewhat stable knit. You see, about two years ago I stumbled across Girl Charlee Fabrics (most likely through links from other bloggers) and was completely overwhelmed by the sheer amount of knit fabric! In the town I live in, thankfully there is a fabric store, but there’s only one, and this one doesn’t stock much besides polyester sweatshirt fleece. Which is fine, sometimes, but my preference for sweatshirt fleece really does run towards bamboo. I digress; so I got really caught up in purchasing all-the-knits in lengths of about 4-5 yards per fabric/pattern. The massive thing I didn’t consider, was that knits come in all sorts of weights, and textures, and opacity. Of course I didn’t order any swatches either. One of the challenges of living in Canada, is that ordering a swatch means you may or may not be able to order the fabric once the swatch shows up and you decide you like it.

So, being the sane person I am, I just went for it and ordered – a lot. This bird fabric, while I very much like the pattern, ended up being much too lightweight and sheer, to be used for its intended purpose of a dress. Instead, it’s more of a t-shirt weight, so I have made up 5 different tops now in this fabric. I still have this one, and I think the other 4 have found homes with my friends. I am a big believer of “just put a bird on it”, but “just put a bird on 5 of them” seemed a bit much, even for me.

When just standing and not trying to pose for a photo I am assured that the back hangs much nicer than what it’s doing above here. That being said, it is my backside, so I can’t confirm this statement. I made this up in a straight size 10 with no alterations. This, in and of itself, is a miracle. I thought for sure that this would take some folding and manipulating to get it to sit the way I wanted. I really like the top and have, as I’m sure you guessed, made multiples.

The really interesting thing I found with this top (aside from the fact that it took only a few hours from cutting to being completely finished) is that when I did a quick look on Pattern Review there were (at the time) only 3 reviews and they weren’t terribly positive. Please know that I am not saying the reviewers did or said anything they shouldn’t have, I’m simply mentioning that this pattern was a perfect fit for me and my body, and it’s interesting how different we are all shaped. Also interesting to note is that this top doesn’t look very good on my friends.

Please excuse the wrinkle on the bust;  I had my photographer for only a set amount of time and I wanted to get as many things photographed as I could. Clearly I didn’t realize the hangup that had occurred.

This second top I made with a very light weight cotton jersey (another Girl Charlee purchase) and used a woven rayon for the back; I was interested to see if I could mix and match fabrics. It works, but I’m not sure that I love the way that it drapes. Again, you can’t really tell as I have my hands up (I have no idea what I was trying to accomplish by this pose…) but when my arms are down, it doesn’t drape quite like I had hoped it would. That being said, it does still get worn with a pair of white linen pants and I quite like the “Hamptons” look that it conjures.

Has anyone else tried and liked, or disliked, this pattern? Do tell…!

The Sallie: Romper

Does anyone else else dislike the term “romper”? Is there another (better) term we could use? I just feel like all of the terms out there for this garment do it a disservice.

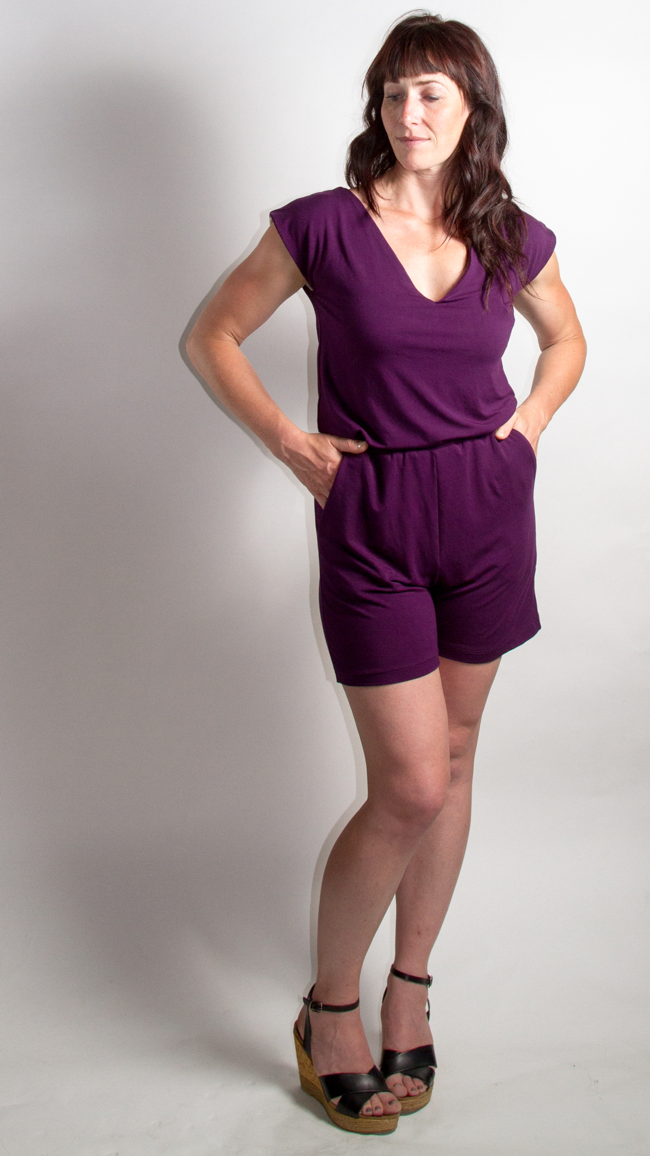
I bought the Sallie Jumpsuit pattern from Closet Case Files the day it was released. And I actually didn’t purchase it for myself. I have this fantastic friend who fits the same clothes as I do, but she and I are opposite in one fairly major way (body dimension wise); I have a very short rise and she has a very long rise. This of course means, that although this lady would look like a bombshell in a jumpsuit, she has never been able to find one that doesn’t produce a certain “named after an animals digit”  in the neither region. This friend of mine unfortunately doesn’t live near me, so having her pop ’round for a fitting just wasn’t possible. I got her to take some body measurements and set to work on a shorts version. This means I was able to test fit without eating up meters and meters of fabric and, let’s face it, it’s pretty darn cute.

The model below isn’t me; as I stated, my girlfriend and I don’t share the same dimensions in what are integral areas to make this pattern fit, and as I mentioned above, said friend does not live close, so managed to ply another friend with enough wine to model a few things! This lovely model below is my dear friend Heidi. Thank you Heidi, for indulging me in my nutty creative pursuits (and for allowing me to bend you like a Gumby doll to pose you into place)!

I ended up adding 2 inches of length to the rise and another 2 inches of length to the bottom of the top pieces. I also had no idea how long to make the shorts, so left about 10 inches of fabric that I quickly hacked down to 5 inches once i tried it on. I believe that a number of other ladies made this pattern in romper form and added some width to the legs. I’m a cyclist and therefore don’t have small quads, but I found this pattern to be the perfect mix of flattering and fitted, but not tight, as drafted. That being said, this leg has less of a 70’s vibe and more of a “look at me I have great legs and can rock the hell out of a pair of wedges”.  I wanted the top to have a bit of a “fold over” effect so it could be worn with or without a belt. Here it’s styled without a belt, but I believe the intended owner tends to wear it belted most often.

The back has a really nice v that shows off a great back, but it’s not so low that you have to worry about bras peeking out – nothing ruins a low or open back as much as a thick wedge of a bra showing.

This romper is made out of a deliciously weighty bamboo jersey that I got from a local clothing store and was amazing to work with. It’s got great drape, is completely opaque, and has just enough body to it that there is no showing of lumps or bumps that are not wanted, just the ones you do want showing stand out. It is also very comfortable to wear and generates a number of compliments, from both men and women. Want to know how I know? I might have sewed one up for myself too, in a black bamboo jersey, and then wore it on a flight to hand deliver this one to it’s intended owner.

How do you feel about distance sewing for others? Have you ever hand delivered a garment to someone while wearing the exact same item just in a different colour? Or in the same colour?!
Tweaked and Manipulated: In a Relaxed Manner.

Look at this! I’m back with another dress (or two) based off of a pattern I have already made! It’s shocking isn’t it? I know, my goodness; me, making multiples of a garment. *Le sigh* let me get on with showing you some photos…

This is good ‘ol New Look 6968, yet again. But I did modify it, yet again.

This time I remembered to redraft the armhole, lowering it about half an inch, and I added back the length to the bodice that I had removed when I shortened the length between the armhole and shoulder seam last time. I made this up in a stretch cotton sateen (stuck through the washer and dryer) which seems to remove most of the sheen, which is my preference.

This is once again my good friend Heidi modelling. Unlike last time, this dress was made for her. That might have been another part of the reason that she was willing to model a romper for me; she has been the recipient of a few articles of handmade clothing over the years.

I was sure that this was a style that should live in my work closet as well. It has all the makings of what makes me tick in my work-wear; pencil skirt silhouette, fitted bodice, but not too tight, fully lined (since I finally managed to draft a skirt lining) and with a bit of stretch (thank you stretch cotton sateen!) for comfort.

I am happy to report that I really like this dress on me, that it fits my work wardrobe and I feel like a lady while wearing it.

Have you ever just pushed through multiple makes of an item, just positive that it was meant for your closet, and have it work out?!

Back with something… New? The sorta camas blouse.

Well, it is a new make. Actually, two new makes, but it’s based off a pattern that I have already made once (okay, okay, I’ve made it twice) and now modified, have made it twice more.

This is actually the second of the two tops that I made. But before I get to the top(s) I want to tell you about work. Well, not really work per say, but I happened to have been at work when I was inspired to make this top. I end up at a lot of networking events for work, which means I get to see a lot of different styles on a lot of different people. For someone like me, it’s certainly one of the perks of the job. So, I was at an event and there was a woman who was wearing a long sleeve top that had a very cool twisted front. This of course sent me down the rabbit hole of trying to mentally take it apart and figure out how it was made. To be honest, I might have missed a bit of the conversation that was happening as I was trying to figure out the construction order… But I covered my tracks well enough (in the conversation) and managed to work out a pattern hack I thought would work.

Enter the Thread Theory Camas Blouse. I made this top a few months ago so I can’t quite remember what I did to modify it, but I think I I just extended the front pieces and removed the neckline trim.

This was a meter of silk that I purchased for a dress but never ended up using, so I stuck this in the washer and dryer (tough love) and cut into it. This is actually the wrong side of the fabric, I wasn’t a big fan of the shine of the right side. As I mentioned, this is top two. The first one (seen below) was made of a polyester in a really great print. I loved it so much I decided I needed it in silk. Well, this silk was a beast to work with and it left me a bit jaded with the top itself. I have worn it a few times, but ended up having to hand sewing the front crossover closed. Ask me how I found out the front cross in a silk was too floaty to stay closed; work function.

This was the first one I sewed – I love it! The weight is just perfect; it’s not clingy or staticy, and the drape sits well with just a small stitch to keep the top closed where I want it to sit. I wear this for work, so I kept the neckline modest, but someone could have a lot of fun with this if wearing a bra wasn’t on your list of “things I need to do”.

Got any good pattern hacks? Spaced out in the middle of a conversation because you were trying just a little bit too hard to determine how to make something? Please tell me I’m not the only one…

A dress of painted gold

Sounds rather extravagant doesn’t it?

Well it is!

LJ Wedding

 LJ Wedding 2

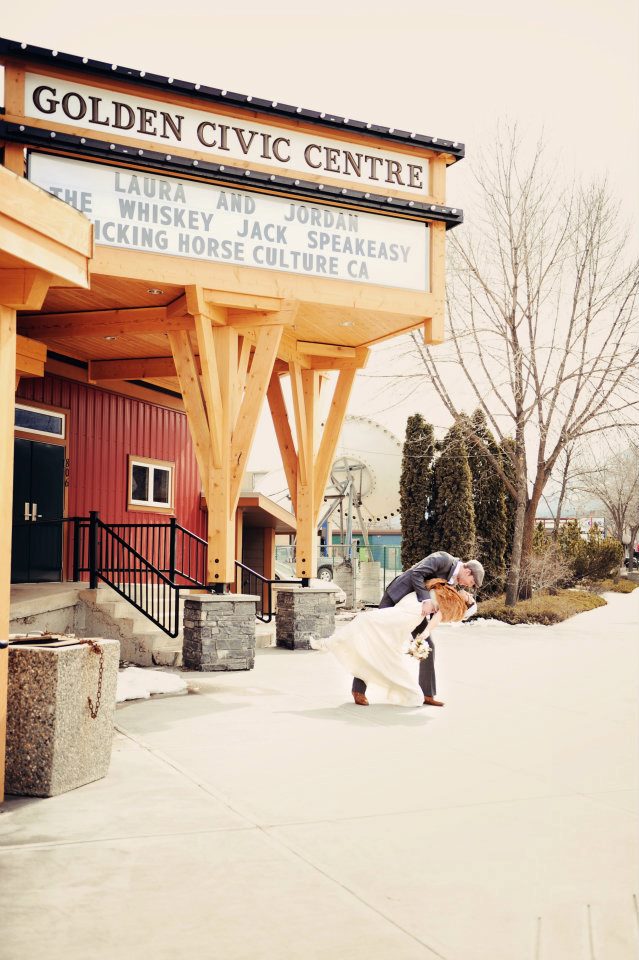
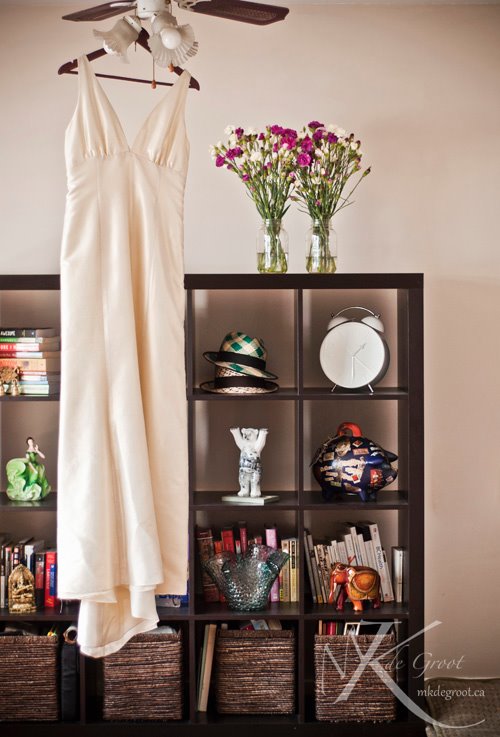
The basic pattern is New Look 6401 with some modifications. I made 2 muslins out of old butter yellow bed sheets, and you can imagine the look on the bride’s face when she tried those beauties on. After two muslins I was ready to cut into the fabrics. The dress has three layers to it; a lining, an underlining and the fashion fabric. It was well worth it to triple layer it as it helped to decrease any showing of bumps or a very attractive undergarment. The seams were sewn and serged. A center back zip was switched out for an invisible side zip and all three layers have machine stitched rolled hems. I really like the way the machine hem made the dress fall as she walked. The fabric wasn’t pre-washed and it was professionally ironed just before wear. That many layers and an old, spitting iron were never going to end in anything happy. I added in blue satin ribbon as stays to keep her undergarment straps in place and used some vintage snaps from my grandmothers stash. I can’t think of a better place for them to have been used.

LJ Wedding 6

LJ Wedding 7

Above 2 photos by Danielle Bossert Photography

This amazing fabric was purchased in India and is a base of 100% silk (in a beautiful off white) that was allegedly painted in gold. It may be gold, and it may be paint, but either way it is the type of fabric that’s a pleasure to work with.

LJ Wedding 3

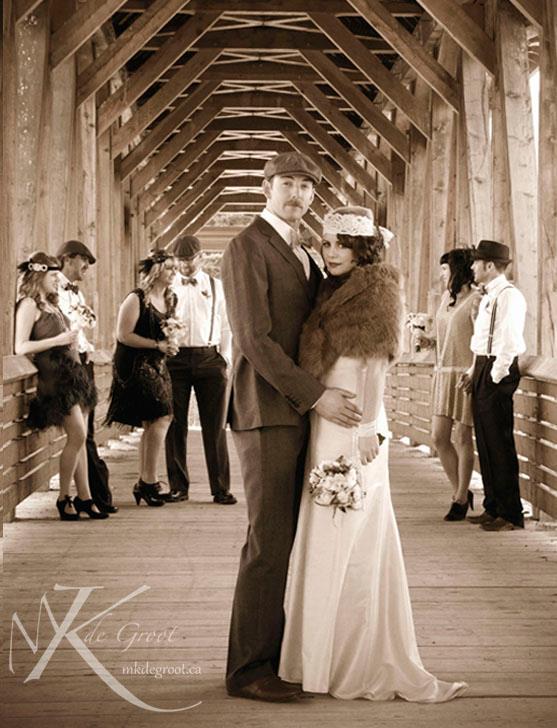
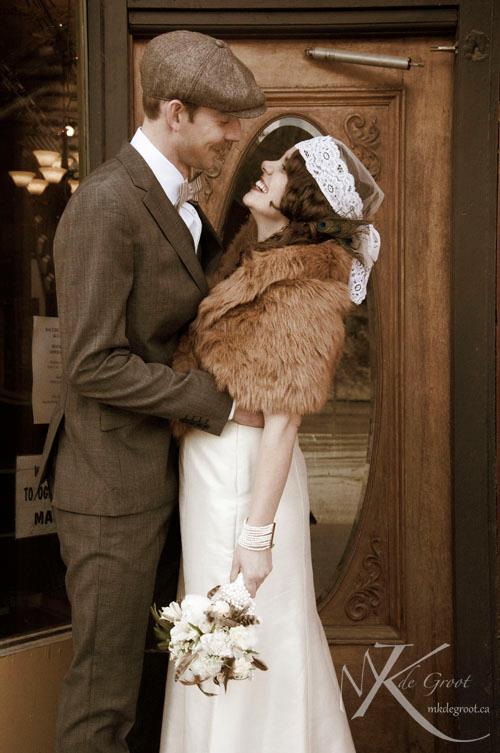
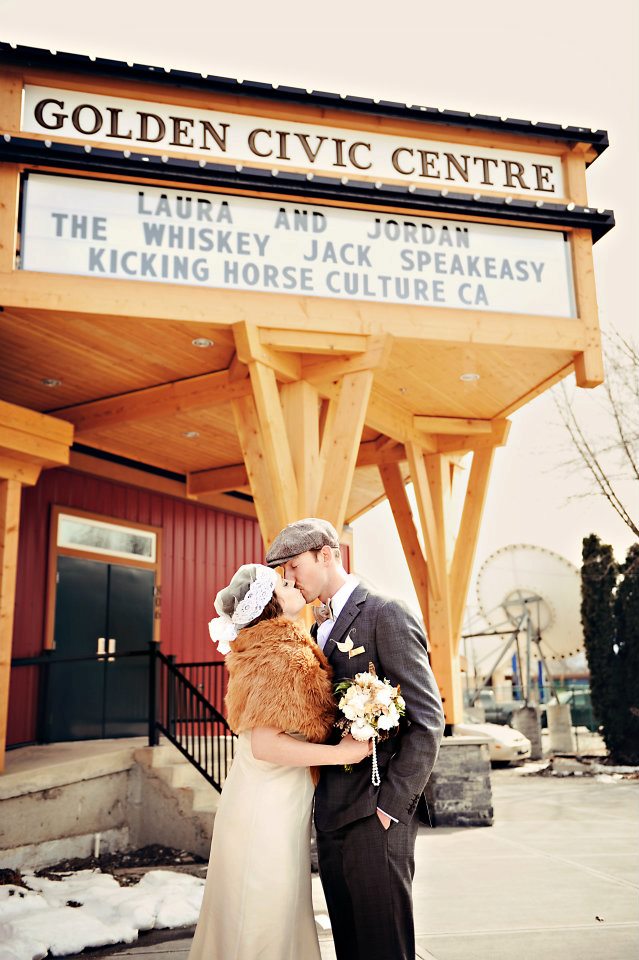
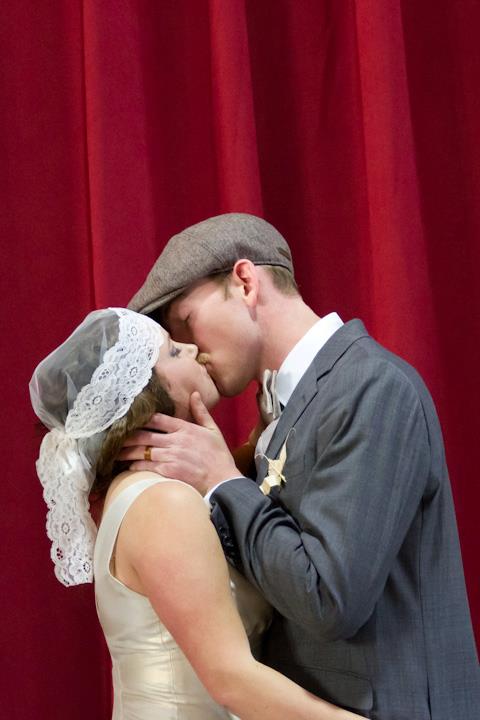
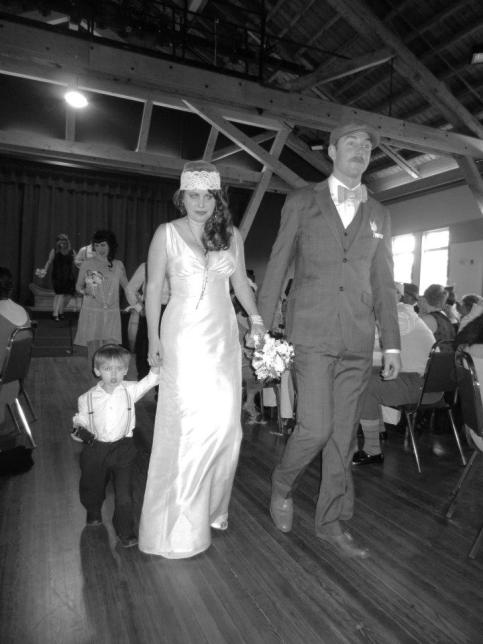
My beautiful girlfriend was married to the man of her dreams a few years ago and I was lucky enough to be a part of the special day, in a small way. After a few unsuccessful dress shopping trips, and a few discussions, I offered to make her wedding dress. She graciously accepted and so the dress came to be.

LJ Wedding 9LJ Wedding 10LJ Wedding 4

They had decided on a 1920’s prohibition themed wedding and they pulled it off in a truly magical way. The photos you see here are not from my typical photographer, but from a few talented women; Miranda of MKDegroot Photography and Danie of Danielle Bossert Photography.

LJ Wedding 11

 LJ Wedding 12

LJ Wedding 13

There’s some photos of the wedding, and some of the dress.

LJ Wedding 8

LJ Wedding 5

Hope you all enjoyed the meander!

Sweatshirts: how many is too many?

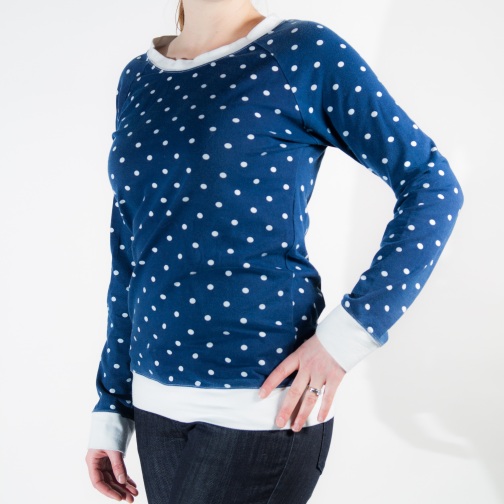
The Lane Raglan Sweatshirt – I love it.

I have made it a total of 7 times in a multitude of fabrics; from poly sweatshirt fleece in a questionable leopard print to a 100% silk knit in an amazing shade of greyish navy blue, now residing with my dear sister-in-law. It was a Christmas gift that I had a hell of a hard time gifting – I really did want to keep it for myself.

image

Let’s back up.

I walked into a department store one day and saw a great deal on a light grey, crew neck, raglan sleeve sweatshirt. I tried it on over my tank top and bought it. Easy. As the weather got cooler I found I kept reaching for this one sweatshirt. I work from home, so my daily work wardrobe is simple; jeans with a top that isn’t a mess, but is still comfy, and looks put together enough that I can throw on shoes/boots and pop out to run a few errands. I found I was wearing said top much more than I should have and so thought about making a few of my own. I have a few knits kicking around in my stash and I thought it might be a good chance to thin the herd so to speak.

My first thought was to pull the pattern from the top itself, but the more I looked at the top, the more I realized there would be a few things that I would ideally like to change; sleeve and body length, just a smidge longer. I also realized that I just wanted to sew. I didn’t want to pull a pattern and tweak it and then test it and then tweak it some more.

IMG_20140715_171354

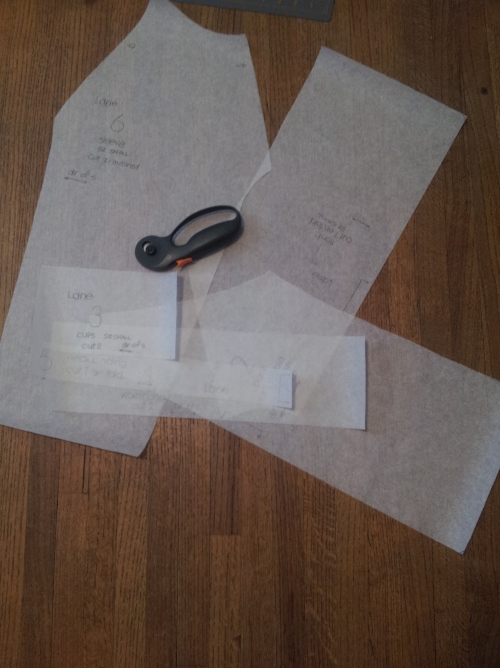
So after a bit of browsing I came across the Lane Raglan Sweatshirt pattern. The images looked spot on and the measurements were ideally close to mine – excellent – very little to modify – YES! So I bought the pattern – and then remembered that I hate taping pdf’s together. But, the thought of owning more tops in all the pretty colours kicked me into gear and away I went. I traced off a straight size small and followed the instructions, and in less than 2 hours from laying out the pattern to a final press I had a lovely new top.

image

I ended up removing an inch of length from the sleeves and the body length but left the rest as is. I ended up making this top up in the standard knit fabrics, and then decided that I wanted to try it in a drapey rayon. Again, this was a stash fabric. I loved the look of this top without the bands so I simply turned under and twin needle stitched the hem, sleeves and neckline. The only thing I wish I had done was to add knit interfacing to the neckline – i find it stretches a bit more than I like after I wear it for a while.

 image

All in all a lovely pattern that I know will pop up a few more times before I’m done with it! Do you have a go-to top pattern? Is it the Lane Raglan as well?

Just a wee bit tight

A few years ago I made New Look 6968 View A (without sleeves) out of a Navy stretch cotton sateen. It was a lovely fabric to work with, the neckline was lovely (even if I did have to sew what felt like too many neck darts, and have them evenly matched) and I followed the instructions and fully lined the bodice.

untitled-0880

The skirt portion is a pencil skirt; an unlined pencil skirt. This means I can NOT wear any tights without the dress riding up. Not what I intended. There was also the issue of the dress being a tad roomy between armpit and shoulder seam. Nothing I noticed before completing the dress in full, and between those two things, the dress ended up being a miss for me. BUT, it was so close to being something I saw myself reaching for time and again for a simple work dress. Therefore, this dress made its way to a good friend and I made the what I assumed were simple changes and left the pattern for about a year.

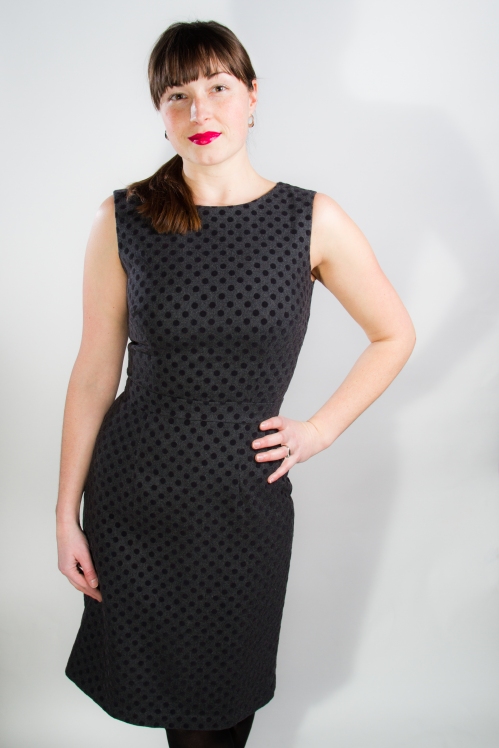
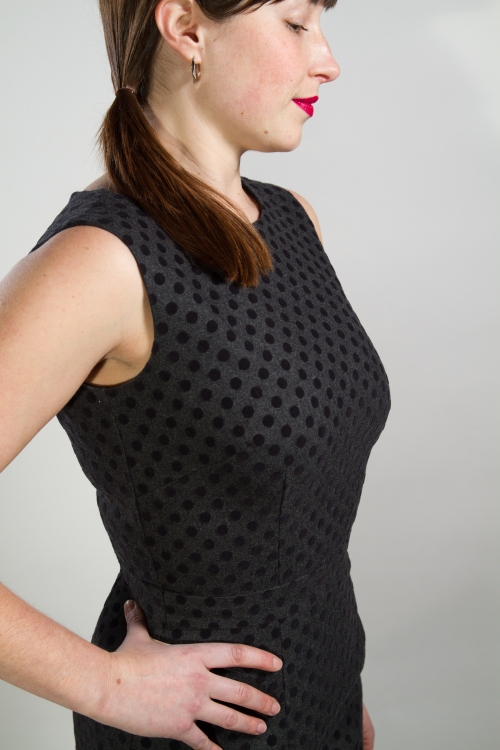
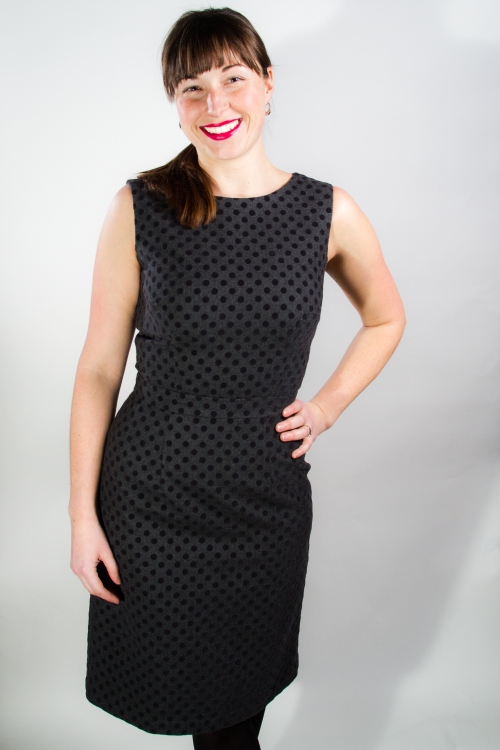
Then I got a great dark grey polka-dot wool blend yardage at a steal and thought – this is perfect for the dress pattern I  modified last year – just a perfect, easy sew. I was being aware and remembered to cut out a lining for the skirt portion too and went to work.

untitled-0875

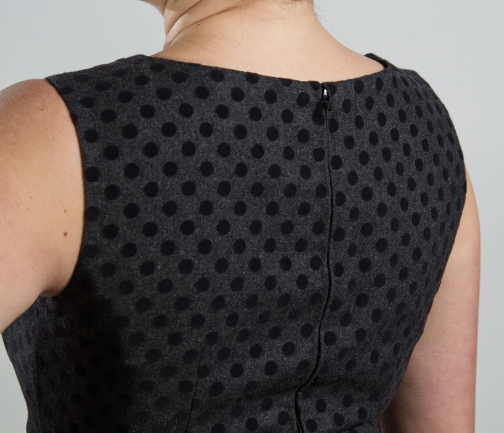
Well, I adjusted for the shoulders alright, but forgot that that would inch the waist line up too… so the waist was sitting too high – not a problem, let’s splice in there a waistband – it’ll look cuuuuuute! Oh, and I also forgot to lower the curve in the armpit too, but of course this I didn’t realize until I had completed the dress. Of course. Add to that the fact that I was lazy and didn’t redraft a lining piece as nicely outlined by Sunni of A Fashionable Stitch, and did I mention that the wool blend has zero stretch to it? Well, it doesn’t. And therefore that nice sleek, but still comfy fit, has eluded me. It’s a lovely dress – to stand in and drink, but don’t even think about sitting or eating, or breathing really… It’s just not gunna happen.

untitled-0877

untitled-0882

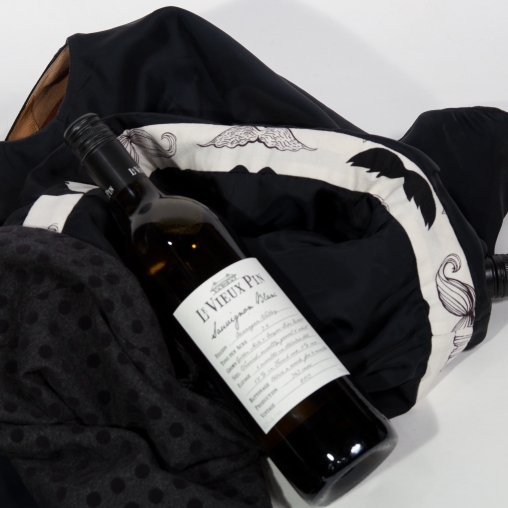
All that being said, I did have fun with the insides and the finish is pretty spot on. It’s fully lined, everything matches up nicely and I have mustaches as the waistband lining. Who doesn’t love a good ‘stache?!

untitled-0886

Also, I must not be remiss in mentioning the lovely wine that is pictured above. For my birthday over the Summer, my lovely mister planned a little bike to wineries tour in Oliver, BC. I must admit we didn’t end up going to many wineries as I blew my entire wine budget at this gorgeous place; Le Vieux Pin. I dare you to try their wines and not love every single one.

Not perfect, but I think after making the above mentioned changes I might give this pattern one last go…

Camas Blouse: a Thread Theory Winner

When I was making jeans for my husband, and then myself, I looked at a few different companies to source the different notions I would need/want. One of these companies was Thread Theory, a wonderful company run from Vancouver Island, by an outdoorsy couple (who have an extremely cute pooch). As I was browsing and filling my online shopping cart with jeans kits, I was also adding to it the Jedediah Pants (for him) and the Camas Blouse (for her!). The Camas Blouse is, from what I can tell, the first women’s pattern put out by this company. I really liked the design details and I was interested to see how their patterns fit into my lifestyle.

untitled-0846

I love it.  The pattern, the design, the final product. It’s all very me.

 untitled-0835

I actually started off using the most lux of fabrics; a cut of amazingly drapey, yet not see through, bamboo jersey (a lovely gift of a cut of fabric) and some black raw silk (for the yolk), and inky blue light weight silk (for the yolk lining).

untitled-0833

The pattern is a PDF, but I think well worth the hassle of printing, taping, and in my case, tracing. I actually traced the pattern out when I was in the middle of my jeans sewing bender and it was a refreshing change of pace from denim.

Based on shoulder measurements, I cut a straight size 8 and made no alterations (cue fanfare). I followed the directions right up until i got to the front placket. I’m sure the directions as written are great for this section, but I decided that I wanted to assemble the placket first, including trimming, notching and serging the edge of the band before I attached it to the shirt. That way there was a lot less bulk to deal with.

untitled-0849

I sewed the hem of the sleeves and the shirt with just a standard straight stitch. This worked well for me as the bottom is drapey, and the sleeves are loose enough to pull on without needing any stretch. If you like a more fitted sleeve I would recommend either a double needle, zigzag stitch or coverstitch machine as a finish.

untitled-0854

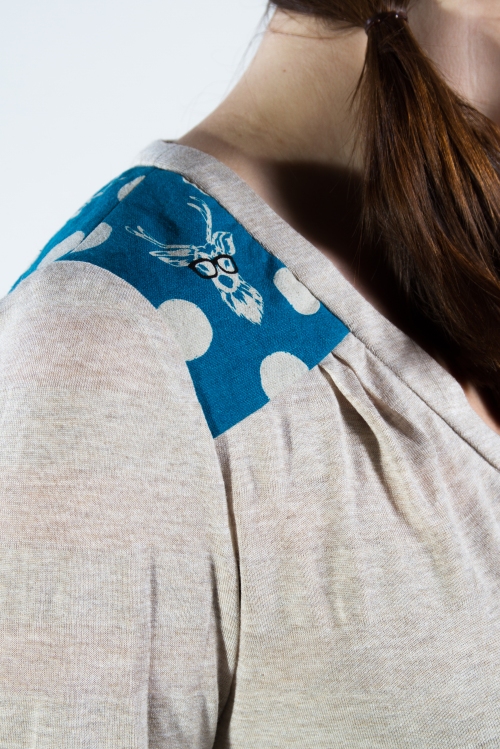
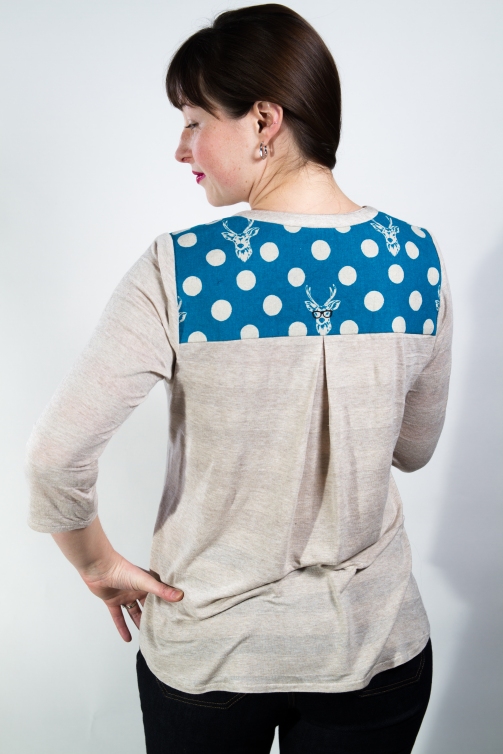
For the second version I used more of my Deer Head Dotty fabric (100% organic cotton) and a 100% Rayon Slub remnant that I think was from Girl Charlee Fabrics. There is a very subtle stripe in the slub that I loosely tried to match up.

untitled-0855

I did also have some fun with converting the gathers into pleats in the front and a box pleat in the back. I think Morgan mentioned doing a blog post about this so keep an eye on their blog.

untitled-0860

I really like the shirt with either the gathers or the pleats and see making this again. I would like to try it in a full woven and will likely play around with this in the next little while. Also something to note, I sewed the buttons right through the placket and didn’t bother to create button holes, so the buttons are completely for show. I find the neckline is more than generous to get this over my head comfortably. The buttons on my first top are from my local chain store, and beige buttons are from my Grandma’s stash that I inherited a few years ago.

untitled-0861

How do you like your tops? With a little deer here and there or straight up classy silks?

Silk: worth the wait

I am lucky enough to have good friends that know me well. They know my personality, my disposition, and my complete and total fabric snobbery.

untitled-0812

I have been sewing for as long as I can remember. I use to sit at my Grandma’s machine and sew up all the scraps she had pulled from old garments. It was a machine that had the “pedal” to the right of the knee, not on the floor, thank goodness or I would have had to wait until I was 12 to start sewing!

For many, many years I use to find the least expensive fabrics possible to whip up into clothing. I just wanted to churn out clothes. The fabric I used, the fit or even the type of garment I made really wasn’t important.

A few years back I stumbled into the world of sewing blogs – I was fascinated by them. One of my favourite finds was the blog Sallieoh. I did the normal stalker thing and read through everything I could find on her blog and I came across this post. It completely spoke to me. And it completely changed how I looked at my hobby, my art.

All this to say, I am now firmly rooted in the fabric snob category and I want to love wearing the fabric that I wear.

So, back to my girlfriend; she was on a trip to LA and visited the garment district. She also has a love of fine fabrics (this would be the friend that came for a visit) and spoiled me with 2 cuts of silk and a generous cut of bamboo jersey.

20141102_170818

I have a RTW top that I love to wear and thought would be a fantastic shape to showcase the fabric. Since it was precious fabric, I didn’t want to jump straight to cutting into it. I decided that instead of spending the time pulling a pattern from my perfect fitting top, I would go the easier route and buy a pattern. I hunted around and finally landed on McCall’s 6927. So I grabbed some silk blend stash fabric (purchased at a great price) and got to work. It was a disaster. The head of the shoulder would.not.fit. I ended up taking most of it apart (french seams and all) and re-cutting the sleeve head down.

20141115_150258

Back together it went but it wasn’t quite perfect. Enter fabric number 2. Stash fabric, but again the fit was just off.

20141115_101447

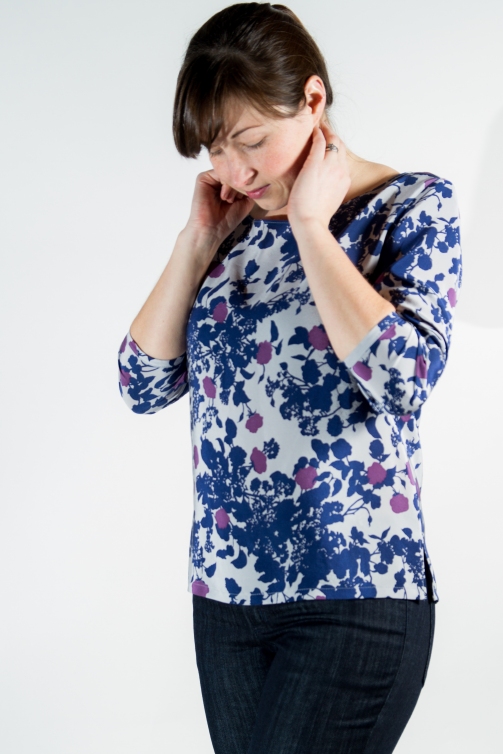
Finally I decided that the best course of action was to pull a pattern from the RTW shirt I loved. Now by this point I was determined to get the fit exactly the way I wanted and was not going to cut into my silk until it was spot on. This time I went to my scrap bin and found some floral poly silky fabric and set to work. The fit was spot on.

IMG_20141220_104746

And then it was time, time to cut into the precious yardage and voila.

untitled-0816

untitled-0814

Let me tell you, I have nothing but bitty pieces of scraps left of this fabric.

untitled-0817

Have you ever had a vision of a garment in your head that you didn’t give up on? Did it turn out or did you end up with a wadder?